


A New York skyline looks impossible until you realize the whole thing is just tall rectangles with dots of light. That is the mental unlock. Once you stop seeing "Manhattan" and start seeing shapes, a skyline kit becomes one of the most satisfying things you can paint, because the payoff at the end is huge and the individual steps are simple.
Skyline kits come in two flavors. Daytime, with blue sky and grey towers, which is the easier of the two. And night, with a dark sky, glowing windows, and a river reflection, which looks spectacular but takes patience. Both usually run 30 to 38 colors on a 40x50cm canvas, though panoramic versions stretch wider. If you want the drama, go night. Just budget the hours.
The window lights are the whole trick
In a night skyline, hundreds of tiny yellow and warm-white squares make the towers. There is no fast way through this. It is a small-brush, one-window-at-a-time job, and it is oddly meditative once you settle in. Do it with a fresh podcast and a steady hand. Two tips that help a lot. First, do not overload the brush, a fat blob spreads past the line and merges two windows into one ugly smear. Second, vary it slightly, leave a few windows dark. Real buildings are never fully lit, and the gaps make it read as real.
Paint the dark building bodies first and let them dry completely before you touch a single light. Wet dark paint next to a bright yellow window pulls the dark into the yellow every time.
Reflections on the Hudson
If your kit shows the river, that bottom section is where beginners either shine or sink. The reflection is a softer, wavier echo of the skyline above. Same colors, less contrast, broken into gentle horizontal bands. The lights become fuzzy vertical streaks on the water, not sharp dots. Keep your strokes horizontal for the water surface and vertical for the light streaks, and the illusion of glassy water snaps into place.
Struggling to get the reflected lights soft instead of muddy? The wet-on-wet method in our color blending guide was made for exactly this.
Sky gradients and that pink dusk
The best skyline kits catch the sky at dusk, deep blue up top fading to a warm pink or amber behind the buildings. Blend it while wet, big brush, work quick. If you have painted a night sky before, a New York dusk uses the same patience as the classic Starry Night kit, minus the swirls.
An American icon for your wall
NYC sits right at the crossroads of two of our collections. It belongs with the world cities, and it is a defining piece of the American landscapes collection alongside the Grand Canyon and the redwoods. That makes it a flexible piece. It works in a modern living room, a home office, or a gallery wall of places you have been or want to go.
Working the towers without going cross-eyed
A skyline is dozens of tall shapes, so give yourself a system. Paint all the darkest building bodies first and let the whole thing dry before any lights go on. Work left to right so your hand never drags across wet paint. When it is time for windows, load the brush lightly, tap off the excess on scrap paper, and place each square with a single dab rather than a stroke. If two windows merge, let it dry and pop a tiny dark square between them to separate them again. That recovery trick has saved more than one of my night scenes.
Choosing between day and night
If this is your first skyline, the daytime blue-sky version is genuinely easier and still looks great, because you skip the hundreds of window lights. Save the night scene for when you have the patience to enjoy the slow bits. Both look sharp framed, and a wide panoramic skyline in a slim black frame reads like a photograph from across the room.
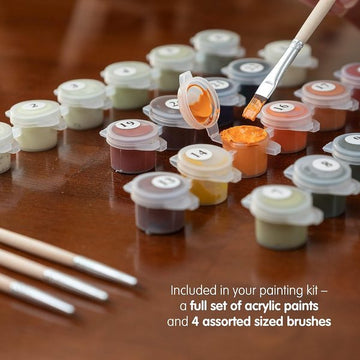
Realistically, a detailed night skyline runs 18 to 24 hours. It is not quick, but few finished kits get more compliments. Browse the cities collection for a skyline, go for the dusk-or-night version if you want the wow factor, and settle in for the window lights. That is the part you will secretly enjoy the most.