


Orchids look harder than they are. People see those exotic, alien-looking blooms and assume the kit is going to be a nightmare. It is not. The big petals are actually some of the most forgiving shapes in floral painting. There is exactly one tricky part, the center, and once you know how to handle it, orchids become one of the most rewarding flowers you can paint.
Let me walk you through the whole thing, kit choice included.
Why the petals are easier than they look
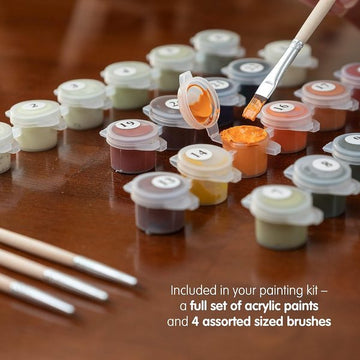
An orchid petal is broad and smooth, with a gentle gradient rather than the tight overlapping folds you fight on a rose. The numbered zones are large. The color shifts are subtle, mostly whites sliding into soft pinks or yellow-greens, which means less contrast to get wrong. Most orchid kits carry 24 to 36 colors, and a good chunk of those are near-whites that all look identical in the pot and completely different on the canvas. Trust the numbers, not your eyes, when you are dipping.
If you have painted a lily or a lotus before, orchid petals will feel familiar. If this is your first flower, orchids are still a fine place to start. The floral and botanical collection has both single-stem and multi-bloom orchid designs, and the single-stem ones are the gentler entry.
The center is the whole challenge
The throat of an orchid, that frilly middle bit, is where all the small numbered zones live. Speckles, color shifts, deep magenta blending into yellow, sometimes a dozen tiny areas crammed into a space the size of a coin. This is the part that takes patience.
Two things make it manageable. First, paint the center dead last, after every big petal is done and dry, so you are not smearing wet paint into that detail. Second, use the smallest brush in the kit and actually let the base coat dry before you add the speckles on top.
How to paint those speckles
The dots and freckles in an orchid throat are dotted, not stroked. Load just the tip of your smallest brush, and touch it straight down onto a fully dry base. If you drag, you get a smear. If you dot, you get a crisp freckle. Work slowly, and don't overload the brush, one dip gives you three or four dots before you need more paint.
Precision work like this is a skill that transfers to every detailed kit you paint after. If tiny areas trip you up, the guide on painting small areas without bleeding is basically written for orchid centers.
Size and time
Stick with a 40x50cm canvas for orchids. Smaller and that speckled center becomes genuinely painful. At 40x50cm, a single-stem orchid takes about 9 to 14 hours, most of it in the petals, with the fiddly center adding a slow, satisfying final hour or two. Multi-bloom orchid branches with three or four flowers push toward 16 to 20 hours because you are repeating that center work several times.
The color that makes it exotic
What gives an orchid its expensive, exotic look is contrast, the pale petals against that saturated magenta-and-yellow heart. If your finished orchid looks a bit plain, it is almost always because the center is undercooked. Push the darkest magenta and the brightest yellow in that throat. That is the part people's eyes go to. Understanding why those two colors punch so hard together comes straight out of color theory basics.
Where it belongs
A finished orchid reads as elegant and modern, more sophisticated than a lot of floral art. The clean petals suit a contemporary living room, an office, or a bathroom. In a slim white or black frame it looks like something from a boutique. It also makes a lovely gift for someone with refined taste, the kind of person who would appreciate the effort in that speckled center. It sits nicely in the gift kits range for exactly that reason.
Pick an orchid from the floral and botanical collection, save the center for last, and dot don't drag. That one habit turns the scariest-looking flower into one of the most impressive things you'll hang.